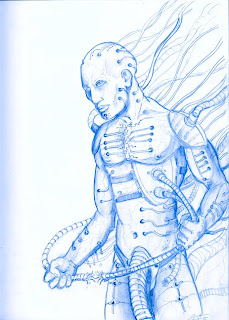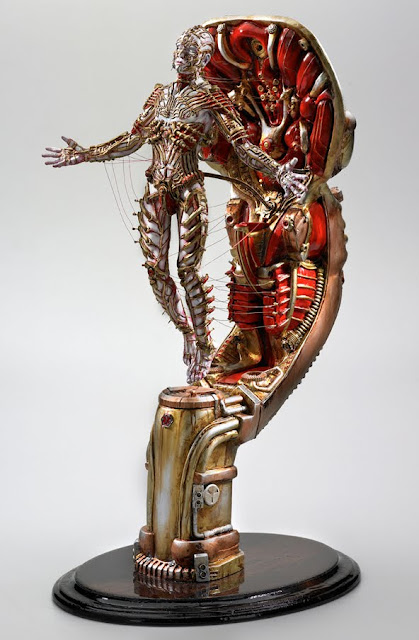
 Before I begin a sculpture, I sketch, gather references, and think about what the characters function or purpose is in the script. In Adam's case, he's been in cryogenic storage for a long period of time. He's waiting for the day medical science can correct a near fatal car accident that left him paralyzed. With this information in mind, I began to think about what the Hospital of the future might look like, what the doctors and nurses might be like, and what kind of technology might be employed in this miraculous rehabilitation.
Since Eva stood 13 inches, I decided to make Adam 14 inches. I started with finding a good image of a skeletal structure and then blew it up to actual size. I used this to build an armature using 1/8" & 1/4" aluminum wire for the overall structure, epoxy putty for bones, and small gauge steel wire for fingers. I then wrapped it all with metal floral wire, which helps the clay stick.
I employed a mixture of Supersculpy and Fimo polymer clay to make the clay a darker shade. When I plan on molding a sculpture and I’m using Supersculpy, I like mixing a darker shade of clay. This serves two purposes: Supersculpy alone has a translucency, which makes it difficult to see your fine surface smoothness. Also, mixing in another color strengthens and conditions the clay. I use 1 pound of Supersculpy for every 56grams (one small block) of soft brown Fimo clay for my mix.

Once the "naked" version of Adam was completed, I made a silicone mold of him, cast a hard resin copy to sand any rough spots, and then sculpted an external suit using a harder clay called Castaline. The idea I had for Adam’s rehabilitation was a complex exo-suit made to stimulate muscle growth, movement, and protect him from injury. I pretty much abandon my initial sketches and just went for it with clay. I find that the best work I do sometimes is when I don't nail myself to a 2D sketch or design. Working in the 3rd dimension allows for so much more exploration and expression. I'm not saying that sketches are not necessary. I just want to illustrate that a sculpture can evolve as you work, making it ten times more enjoyable.
This was the first time I worked with Castaline clay. It was a bit sticky, but overall I enjoyed working with it, plus I gained the experience. I kept chopped up bits on a small electric tea warmer over aluminum foil. This kept it nice and soft to apply and shape. Then once it hardened, I'd go in and shape it with pallet metal tools. Most of the circuitry was done with an Xacto knife. I'm not certain of how long it took, because it was an hour or two here and fifteen minuets there. It felt like forever. I love to create details with tubes, wires, or whatever I can find. On this piece, I wanted to have as much control of the detail as possible. In other words, I did it the hard way. The only thing that bothered me about making him a puppet was that the fingers had to be slightly thicker than I wanted them to be in order to accommodate the armature within them. Next time I plan on making a larger puppet overall so I can avoid that. Sigh...a small price to pay for functionality sometimes.
Next, I went onto another silicone mold! Most people like to do 2 piece case molds. I say, the hell with that! I hate making walls! I lay it up in one piece, pour in one piece, and then cut that bitch in half! In this shot with Adam in the pink stuff, I was trying to show my cutting technique.
First I take an Xacto knife, a blow touch, and a pair of needle nose pliers to put a kink in the blade. Then I take that knife and SLOWLY cut the center of my dividing edge. This makes a nice gutter key all along the mold. To finish the cut, I take a long bladed box cutter and wiggle it as I cut through the rest of the silicone. This makes a ridged edge for the silicone pieces to mechanically bond to one other. The key to doing this technique is to GO SLOW and BE CAREFUL. One slip and next thing you know, your mold has a huge gash in it. It’s worth it to perfect this method, because you don't have to make dividing walls in the silicone clay layup, which can save oodles of time.

OK, now that I've ranted on about that…I'll explain a little about how I reposed and re-sculpted some of the parts for the finished sculpture (seen above). After I made some nice self skinning poly foam castings with an internal wire armature, I started playing with poses above the Hatch sculpture and thought to myself; WOW, this could be a cool art piece if I do this! Why not!? I positioned it in an angelic rising pose and before I knew it, I was back at it with more clay. I found areas I didn't like too much. Like the top of the head looking too Hellraiser-Pinheadish, so of course, I changed it. The hands were too big, so I made the feet bigger, plus I had to patch tons of air bubbles in the poly foam. I'm sure I could have done it a different way, but I somehow managed.
Then of course I remolded it yet again, for the third time now. But this time it was not so easy. I had to have a support in the back of the sculpture because it would not hold it self up. This meant I had to mold it as is with the jackets! I had to do a lot of planning and thinking before I began. I would like to explain how I did it, but I then I'd have to write a small instruction's booklet with diagrams and images. For the record I DO NOT RECOMMEND EVER DOING IT THIS WAY! This is a no-no. I'm lucky I ended up with a workable mold. People tell me to let it go when I'm done, but sometimes I just want to make an art piece too!
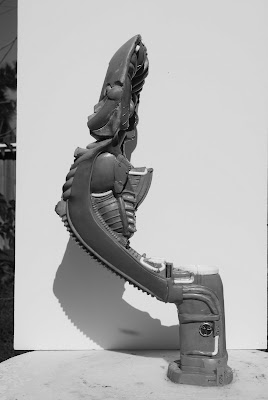
Anyway, finally, here are a couple shots of the first gray primered casting with Adam on the Hatch base. I used 3 pieces of bent all-thread to attach him so his feet hovered about a half-inch off the base. In my next post I'll cover how I painted and detailed the piece.
Thanks for reading!


